Configuring Refapp for Ashby
The Ashby integration uses Project Templates for reference check settings. To read more on how to set up and use project templates with an ATS-system, follow this guide.
Using Refapp through Ashby
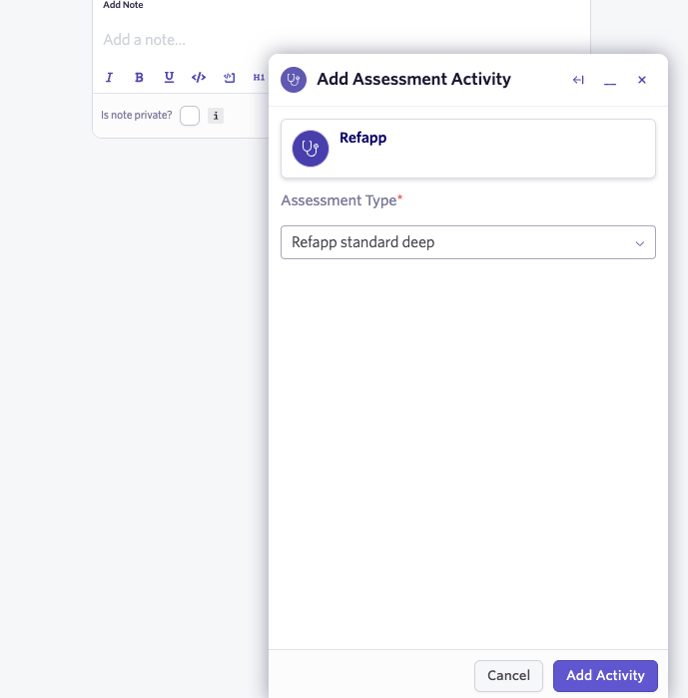
Start by navigating to a candidate within Ashby. There, select New Activity, then Assessment.

Select Refapp, then pick an Assessment Type, and confirm with Add Activity. The list of assessments will be made up of Project Templates from Refapp that you set up beforehand.
Press Start Assessment to send the candidate information to Refapp, Ashby will ask you to confirm the project one more time. Confirm with Start.
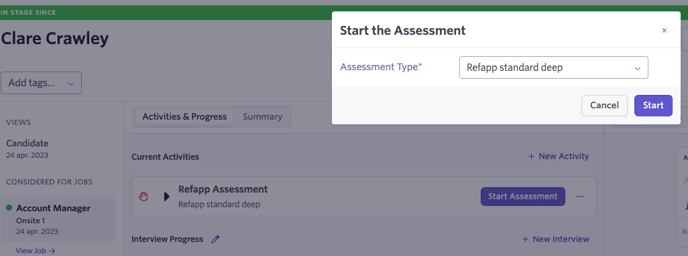
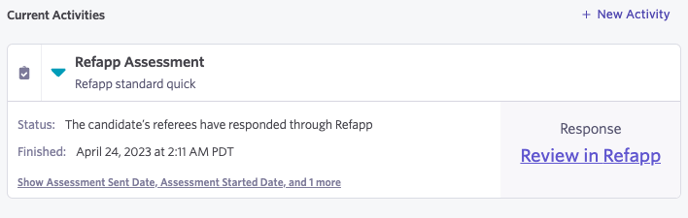
Once you've clicked start, a project will automatically be created in Refapp, and the candidate gets added to the project. If your project template has automation turned on, an email and/or SMS has been sent to the candidate requesting them to submit their referees. The progress of the reference check is indicated by Ashby through an icon on the left. Folding out with the arrow will show the status message from Refapp. Folding out again with the show link at the bottom will give access to links in Refapp.
Once a referee has answered, the status will update in Ashby, and you will have a link to the finished reference report.